Essential Checklist
Basic requirements for riding legally (and protected) in Thailand
– IDP with motorcycle endorsement stamp, (not required if you have a Thai motorcycle license)
– (for identification at checkpoints) – Note: A Thai license is normally an acceptable form of ID. If a rental shop has your passport, make sure to keep a photocopy of passport.
–(Optional – but strongly recommended)
Do I need a motorcycle license to ride in Thailand?
Yes. To ride legally in Thailand, you should hold a valid motorcycle license for the type of bike you are riding. A car-only license is not enough, even for smaller scooters or automatic bikes.
Is a car license enough to ride a scooter in Thailand?
No. A standard car licence does not legally cover motorcycles or scooters in Thailand. If you are stopped or have an accident, having the wrong licence can create problems with fines, liability, and insurance.
Do I need an International Driving Permit in Thailand?
If you are visiting Thailand, you will generally need your home motorcycle licence plus an International Driving Permit that covers motorcycles. The IDP should match the license category you already hold in your home country.
What documents should I carry when riding in Thailand?
You should carry your motorcycle license, your International Driving Permit if applicable, and ID such as your passport or a copy of it. It is also smart to keep any rental paperwork and insurance details with you in case of checkpoints or accidents.
Do I need insurance to ride or rent a motorcycle in Thailand?
At minimum, make sure the bike has legal road insurance, but do not assume that is enough. You should also check exactly what your rental policy covers and strongly consider personal accident or travel insurance, especially for medical treatment and repatriation
Will travel insurance cover a motorcycle accident in Thailand?
Not always. Many travel insurance policies only cover motorcycle accidents if you are properly licensed, wearing a helmet, and riding within the terms of the policy. If your paperwork is not correct, your claim may be rejected.
Is it safe to ride a motorcycle in Thailand?
Thailand can be an incredible place to ride, but road conditions and traffic behaviour can be very different from Europe, Australia, or North America. New riders should be cautious, avoid busy city traffic, and take time to understand local road habits before tackling longer routes.
Can I ride at night in Thailand?
It is generally best to avoid riding at night, especially if you are unfamiliar with the roads. Reduced visibility, unlit vehicles, unpredictable traffic, animals, and drink driving all make night riding riskier.
Do I need to wear a helmet in Thailand?
Yes. A proper helmet is essential, and both safety and enforcement matter. Do not rely on the cheapest rental helmet if it does not fit properly or offers very limited protection.
Should I leave my passport with a rental shop?
It is usually better not to. Many experienced riders recommend leaving a cash deposit or passport copy instead of the original passport, because your passport should stay under your control whenever possible.
Can foreigners buy a motorcycle in Thailand?
Yes, foreigners can buy a motorcycle in Thailand, but you will usually need your passport and a residency certificate, unless you have a yellow house book. If you are buying second-hand, it is best to complete the transfer properly through the DLT and make sure the paperwork is in order.
Can foreigners finance a motorcycle in Thailand?
Sometimes, but it is more complicated than buying outright. Requirements vary by dealer, and finance often depends on things like a work permit, proof of income in Thailand, a Thai guarantor, or a large deposit.
Can I take my motorcycle across the border into Thailand?
If you are bringing in a foreign-registered motorcycle, you may need a Foreign Vehicle Permit depending on your vehicle registration and travel route. Thailand’s official permit system includes specific application routes for motorcycles, including multi-province options.
Can I take a rental motorcycle across the border?
Sometimes, but only if the rental company allows it and the paperwork supports it. Cross-border riding depends on the bike’s registration, ownership documents, border regulations, and the rental provider’s own rules, so always confirm in advance.
When is the best time of year to ride in Thailand?
The coolest and most comfortable riding season is generally from around November to January. Conditions can become smoky in some northern areas later in the dry season, April is very hot, and the rainy season can make riding more difficult depending on where you go.
Content
License, Tax & Insurance
Thai License Application Process
Note: Different provinces may have slightly different rules. This guide covers the main criteria for riding in Thailand in cities such as Bangkok and Chiang Mai. To RENEW a license. Follow the same steps but omit the tests. You can also use the OFFICIAL BOOKING APP.
DOCUMENTS REQUIRED
The documents you will need for the license application:
- Medical Certificate
- Residency Certificate
- Copy of Passport and Visa page
- Application for Driving License

STEP 1 – Medical Certificate
The medical certificate is a simple in-out check-up, involving a weight and heart rate check. Drop into any hospital/clinic and let the staff know that you need a medical certificate for a driving license application. They will know what you need. Very straight-forward. Walk in, pay, and go.
Cost: Approximately 100-200 baht (depending on where you go).
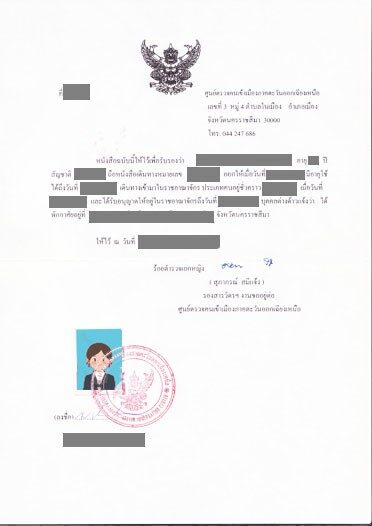
STEP 2 – Residency Certificate
The simplest place to obtain a Residency Certificate is from the local immigration office of the town or city you are staying in. Certificates may also be issued by your Embassy, but the cost is usually much higher. The fee and time to process the certificate vary depending on the rules your immigration office has set.
Cost: the price will vary from free to 1500 Baht (also depending on if you use an agent)
What you will need:
1: 2 x Colour Photos
(2×2 Inch)
With the updated current system this may not be required. It is still a good idea to have, just in case.
2: Copy of Passport Info
Photo/Info page, Visa page, TM6 arrival / departure card.
Take original passport also.
3: Proof of Address
Rental contract, blue/yellow book – or letter from your landlord.
4: Application Form
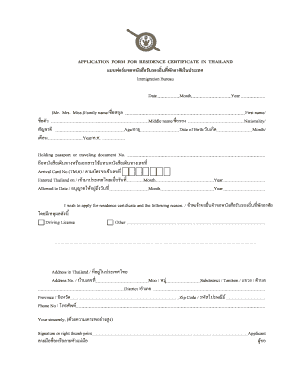
Available at immigration, or can print out one directly from below.
APPLICATION FORM
Immigration times for processing certificates:
DROP OFF:
between 9 am and 12 pm,
along with the fee.
PICK UP:
between 1 pm and 4:30 pm,
(Usually) next day. They will inform you.
*NOTE* The form is only good for 30 days and expires thereafter.
STEP 3 – The DLT
Take your documents to the nearest DVLA Land & Transport Office and hand them in at the counter, requesting to apply for the license. They will check your documents and issue you with a number. Wait in the waiting area until called.
You may be able to complete the theory and practice within the same, but if busy you will be assigned appointments spread out over two or more days.
Applying for the License
PROCESS:
Submit application and documents between 8:00 – 9:00 am
Reaction tests and video (approximately) 9:00 – 10:00 am.
Theory Test ( morning or afternoon. You will be informed).
Driving/Riding Test.
A simple test.
Not difficult if you have taken lessons/practiced riding.
Receive a license and pay the fee
(your first license will normally be for 2 years. Approximately 200 baht)
THREE STAGES
1: PHYSICAL TEST
2: THEORY TEST
3: PRACTICAL TEST
Stage 1: Physical Test
1: Colour Blindness Test
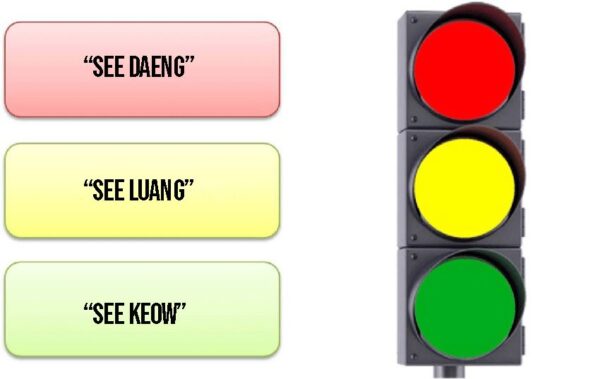
An official will point to various coloured circles and you must state the colour.
You can usually read this out in English, but a good one for Thai learners to practice with. When you pass you will be asked to move to the next stage.
2: Reflex Test
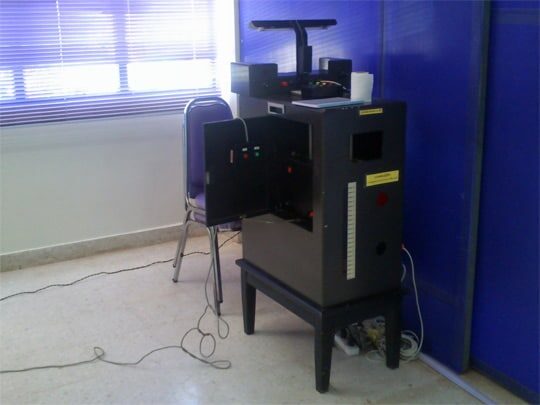
In this test, you will take a seat in front of a LED screen.
At your feet lies a gas and brake pedal. Press down on the accelerator until the green LED’s begin to light up, but hit the brake pedal before the LED’s hit the red zone. You will need to pass the test twice to enter the next stage.
3: Depth Perception Test
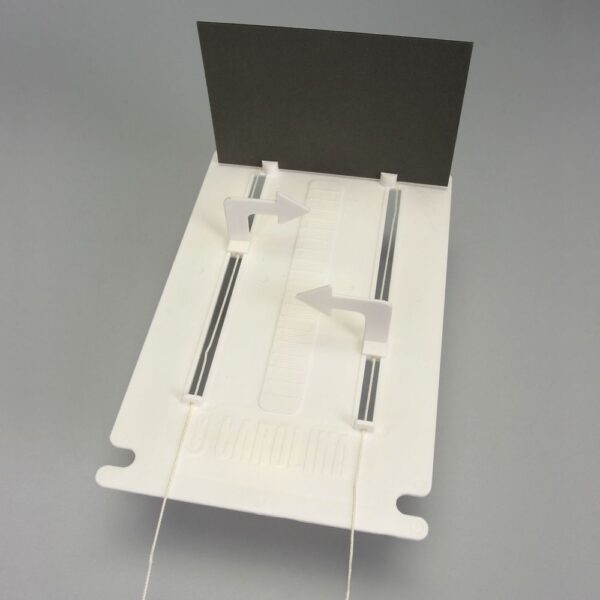
In this section, you have to press forward and back buttons to align a moving pin with a fixed pin (at 10 meters distance).
(*Tip* – with all these tests it is best to hang back and watch how others are carrying out the test first)
4: Road Safety Video

A one-hour-long safety video on driving and riding in Thailand.
As a foreigner, you will be conducted in a separate room, where the video will be shown in (normally) English language.
The video shows a lot of accidents, so be prepared for a pretty grueling watch.
Stage 2: Theory Test
1: Theory Test Room
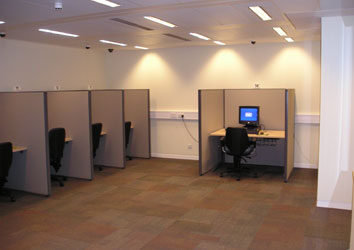
Once you have completed the physical test you will need to pass a theory test.
The test is a 30-minute multiple-choice, which takes place twice each day (normally at 11 am and 3 pm).
You can sit the exam twice at each sitting and requires a 75% pass rate. The results are usually given out within 20 minutes which is when you can arrange to book the practical test.
2: Theory Test Questions
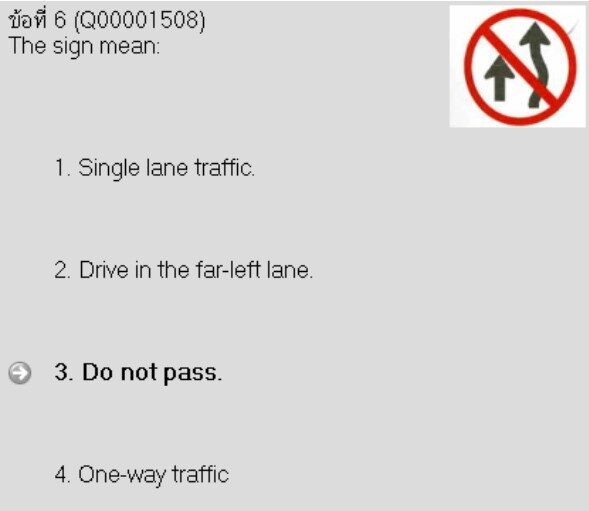
Some of the questions are a little odd, so it is best to study the questions and answers.
DETAILED QUESTIONS:
Theory Test sample questions 1
Questions 2
Sample Interactive Test:
Interactive Test (Note: I noticed some issues occasionally with this interactive test link)
Stage 3: Practical Test
*Note*: You must have your own vehicle for the test. The centre does not provide any.
The practical test for riding in Thailand takes place in the DLT centre compound. Take your forms to the officer and wait to be called. Before taking the test, you will be given a short explanation before being sent off to do the very simple course.
The course involves using your turning signals, stopping completely at a stop sign, and driving over a wooden plank (which is wide).
Once you have completed the test and given a pass stamp return back to the main building and hand in your forms. You will be given yet another number and asked to wait.
The video (by “ApponsThaiFood”) shows the simple riding training circuit for riding in Thailand.
STEP 4 – Final Step
Obtaining the License
When your number is called you will be requested to pay the fee for the license (normally 155 Baht for a motorcycle license). Once you have paid you need to wait one last time for your digital photo. When your name is called you will have a digital photo taken and your license will be printed onto a plastic card.
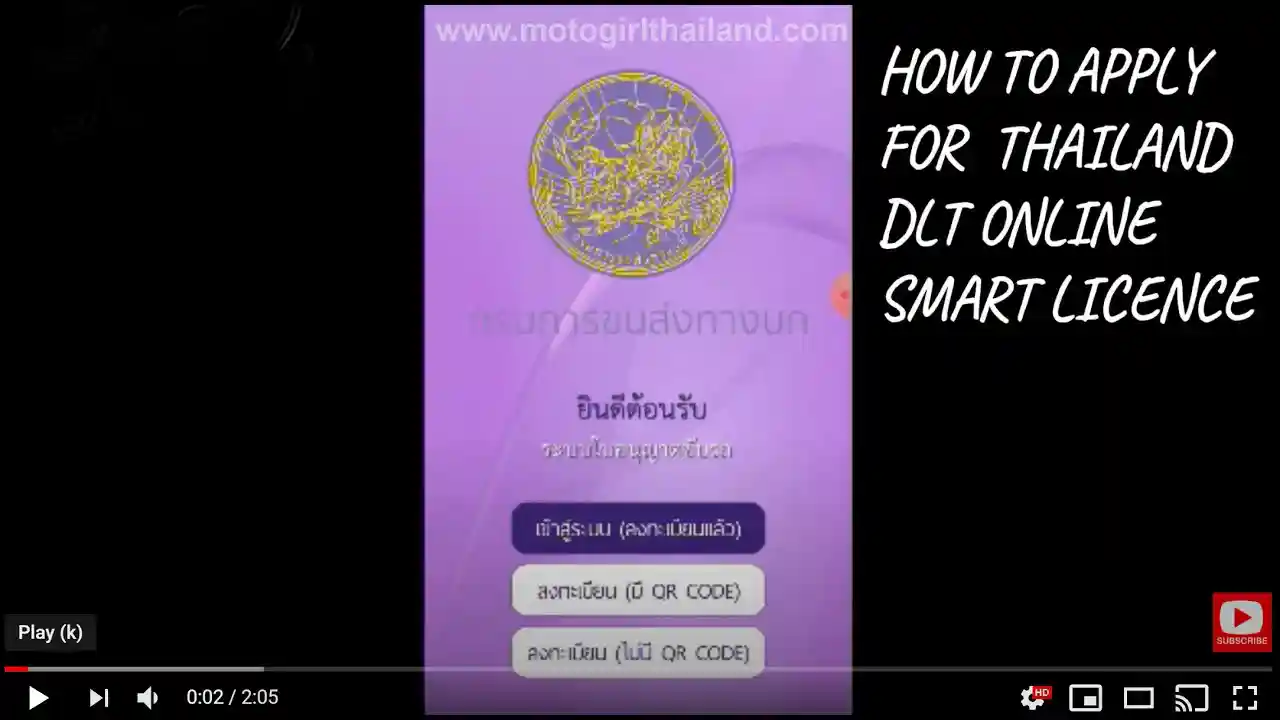
Tip: You can register your license on a phone app. Download from HERE.
*NOTE*
Your first motorcycle license is for 2 years. After 2 years you can receive a 5-year license (with all visas except for tourist visa)
[wbcr_advert_snippet id=”18970″]
Converting to Thai License
If you are staying longer than 3 months in Thailand, by law you are required to obtain a Thai license. This article is based on the system used in Chiang Mai. Other provinces may differ slightly. To RENEW a license. Follow the same steps but omit the tests. You can also use the OFFICIAL BOOKING APP.
DOCUMENTS REQUIRED
The documents you will need for the license application:
- Medical Certificate
- Residency Certificate
- Copy of Passport and Visa page
- Your Current License
- Application for Driving License
STEP 1 – Medical Certificate
The medical certificate is a simple in-out check-up, involving a weight and heart rate check. Drop into any hospital/clinic and let the staff know that you need a medical certificate for a driving license application. They will know what you need. Very straight-forward. Walk in, pay, and go.
Cost: Approximately 100-200 baht (depending on where you go).
STEP 2 – Residency Certificate
The simplest place to obtain a Residency Certificate is from the local immigration office of the town or city you are staying in. Certificates may also be issued by your Embassy, but the cost is usually much higher. The fee and time to process the certificate vary depending on the rules your immigration office has set.
Cost: the price will vary from free to 1500 Baht (also depending on if you use an agent)
What you will need:
1: 2 x Colour Photos
(2×2 Inch)
With the updated current system this may not be required. It is still a good idea to have, just in case.
2: Copy of Passport Info
Photo/Info page, Visa page, TM6 arrival / departure card.
Take original passport also.
3: Proof of Address
Rental contract, blue/yellow book – or letter from your landlord.
4: Application Form
Available at immigration, or can print out one directly from below.
APPLICATION FORM
Immigration times for processing certificates:
DROP OFF:
between 9 am and 12 pm,
along with the fee.
PICK UP:
between 1 pm and 4:30 pm,
(Usually) next day. They will inform you.
STEP 3 – The DLT
Take your documents to the nearest DVLA Land & Transport Office and hand them in at the counter, requesting to apply for the license. They will check your documents and issue you with a number. Wait in the waiting area until called.
STEP 4 – Final Step
When your number is called you will be requested to pay the fee for the license (normally 155 Baht for a motorcycle license). Once you have paid you need to wait one last time for your digital photo. When your name is called you will have a digital photo taken and your license will be printed onto a plastic card.
[wbcr_advert_snippet id=”18970″]
Tax & Insurance
Tax & Third-Party Insurance

The simplest way to tax and insure your bike is by looking out for “Porabor” garages. Look out for the logo above.
They will check your bike and sort out the tax and insurance for you. Give them the green book, let them check the bike, then return a few days later to pick up the tax disc.
Additional Insurance

CheckDI (formerly “Mr Prakan”) is an online broker, providing various insurance options for riding in Thailand.
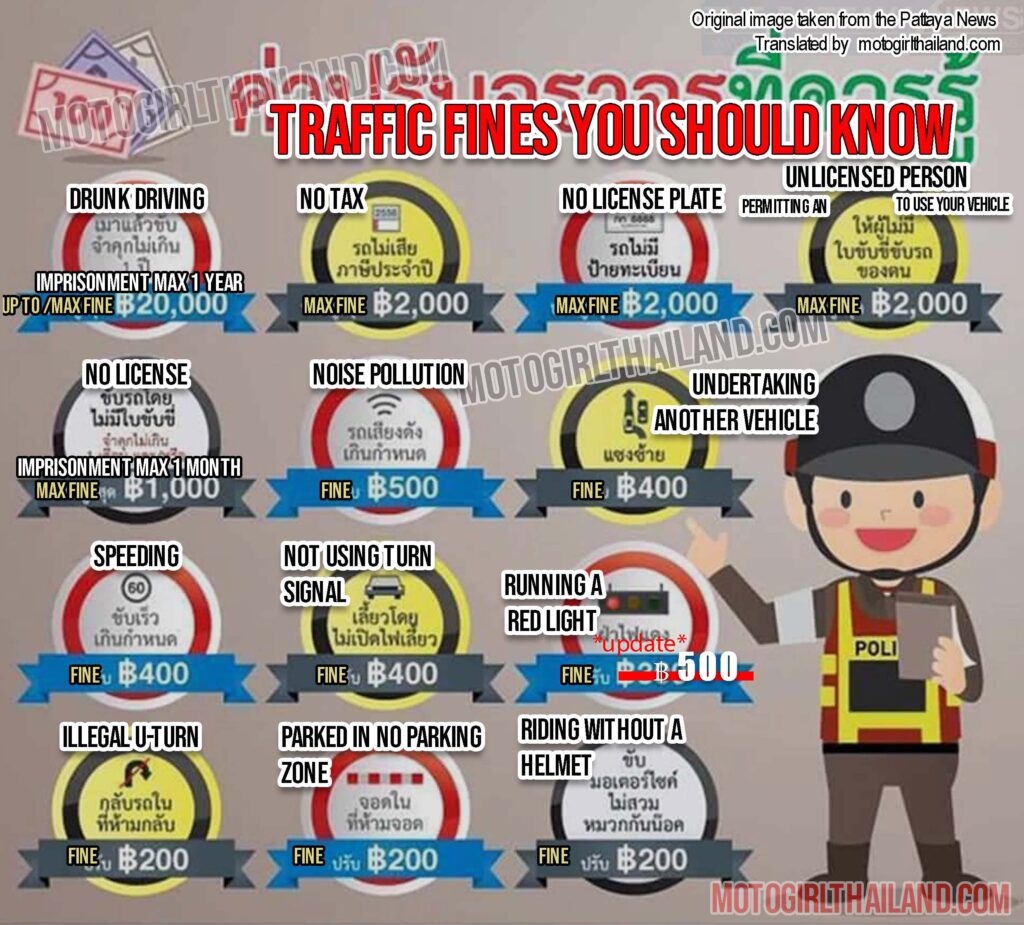
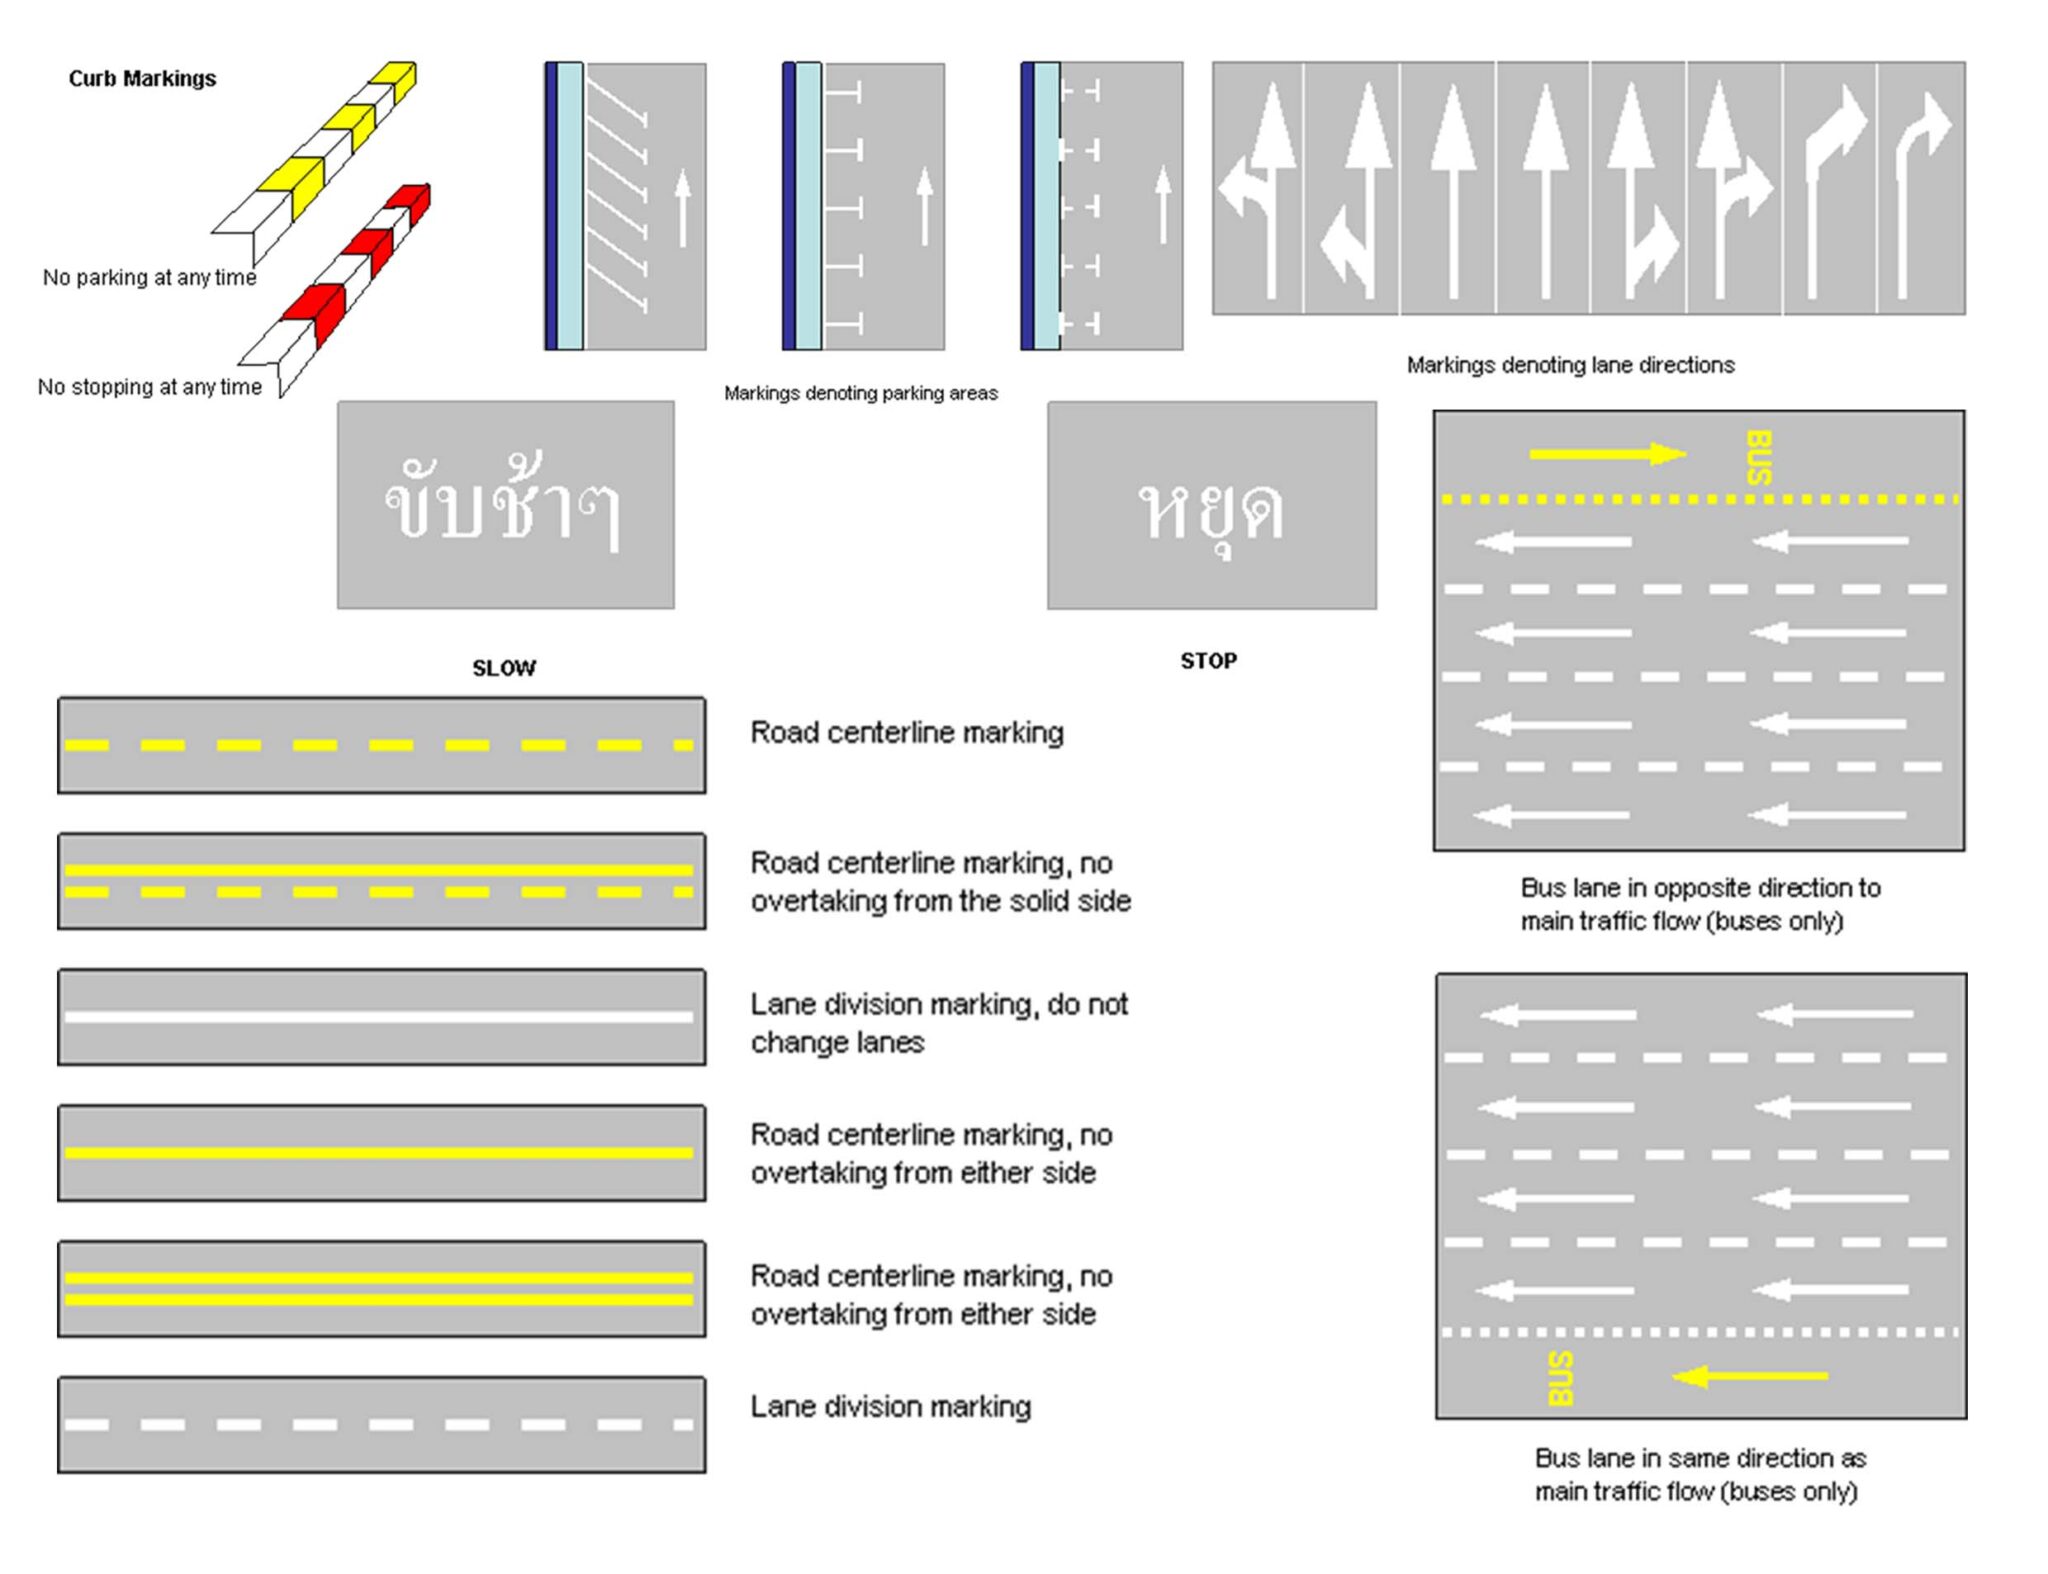
Road Rules & Fines
Thailand is right-hand drive (left side traffic). This may take some time to get used to if you are from a left-hand drive country.
Neighbouring countries Laos and Cambodia are both left-hand drive.
*UPDATE* fines have increased since this graphic.- . Running a red light is now 500 baht – Other fines have likely increased. If your documents are in order, then it is unlikely that you will have any issues with the Traffic Police when riding in Thailand. Additionally, certain checkpoint zones have different criteria. For example, in high tourist spots, you will likely see only foreigners pulled over.
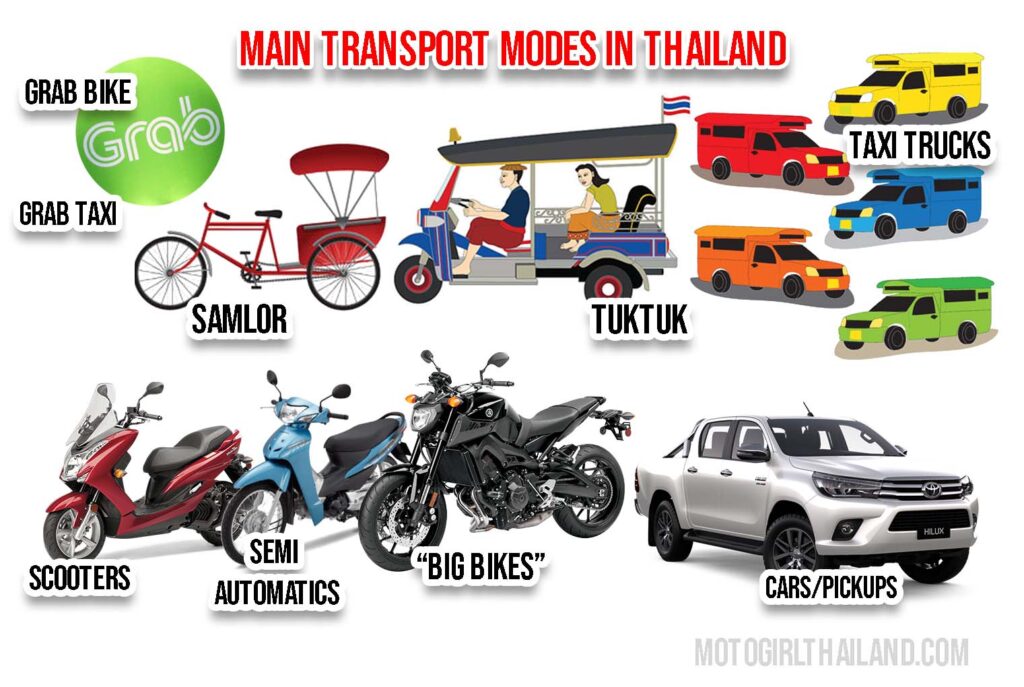
The common vehicles are listed above. Most scooters, semi-automatics 115cc and up. Most manual bikes start from 125/150cc. “Big Bikes” are normally classed as any bike above 250cc.
Mechanics & Part Shops
Piston Shop

Piston Shop (also known as Chiangmai Moto Part) has been operating for over 10 years. The owner speaks English and the shop is a firm staple for many riders.
MX Moto

Best for off-road bikes
English-speaking owner. Great for Honda CRF and off-road bikes. Dyno on the premises. Supermoto conversions.
Sangchai Panich

Bike parts, tyres & accessories
Daengkorn

Welding and metal work
Buying & Selling
Buying a Bike
DOCUMENTS REQUIRED
- Passport / ID
- Residency Certificate
(or yellow book)
1: BUYING A BIKE FROM A DEALER
Purchasing a bike outright: you will need your passport (original plus copies of Photo Page, Departure Card, Visa and end of stay stamp), residency certificate, and (of course), money. The dealer will arrange all the paperwork. If you have a yellow book (proof of address), you should not need the residency certificate.
Purchasing a bike on finance: This is a bit more tricky and different dealers will have different stipulations. As a general rule, you will be required to have a work permit (and salary paid in Thailand), a Thai guarantor and a large deposit. Some dealers may not require a Thai guarantor, or even a work permit (in some cases proof of ownership of a home in Thailand will suffice). This varies from dealership to dealership, so you will need to check with the dealer.
*TIP* You can haggle the price at dealerships. Aim to get a discount or some bonuses included.
2: BUYING A BIKE 2ND-HAND
You will need your passport, residency certificate
Ownership transfer form (download from HERE), and money.
If you have a yellow book (proof of address), you should not need the residency certificate.
If the seller is a foreigner, they will need their passport (and copies of the photograph page, current visa stamp, and TM (departure) card), PLUS one of the following:
Work Permit (Photocopies of every page).
– OR –
Residency Certificate
If the seller is a Thai, they will need their ID card (copy of front and back on one page)
– AND –
House Registration Document (Tabien Baan)
Make the purchase exchange at your local DLT to ensure that the green book change of name process can be carried out at the time of purchase.
Not all bikes come with a green book. In the case of invoice papers only (import and older bikes). Check that the invoice papers are in order. In this case, you are purchasing with some risk involved and although the bike can be taxed and insured using the invoice papers, the bike will not have a license plate.
Selling a Bike
DOCUMENTS REQUIRED
- Passport / ID
- Residency Certificate
(or yellow book) - Vehicle Transfer Form
- Green Book (if available)
Previously, when selling a bike you did not need a residency certificate, but it seems this is now required, (unless you have a yellow book as proof of address. In which case you should not need the residency certificate.)
When the bike has a green book, make the purchase exchange at your local DLT to ensure that the green book change of name process can be carried out at the time of purchase.
You will need a transfer of ownership document, which you can download from HERE.
If your bike has invoice papers only. Check that the invoice papers are in order to ensure that the new owner has no issues with keeping tax and insurance up-to-date.
*IMPORTANT NOTE* – These instructions and rules may change. This information is relevant to my knowledge. If anyone has new information or has encountered any issues, please do let me know, so that I can update this information. Thank you.
Training Centres
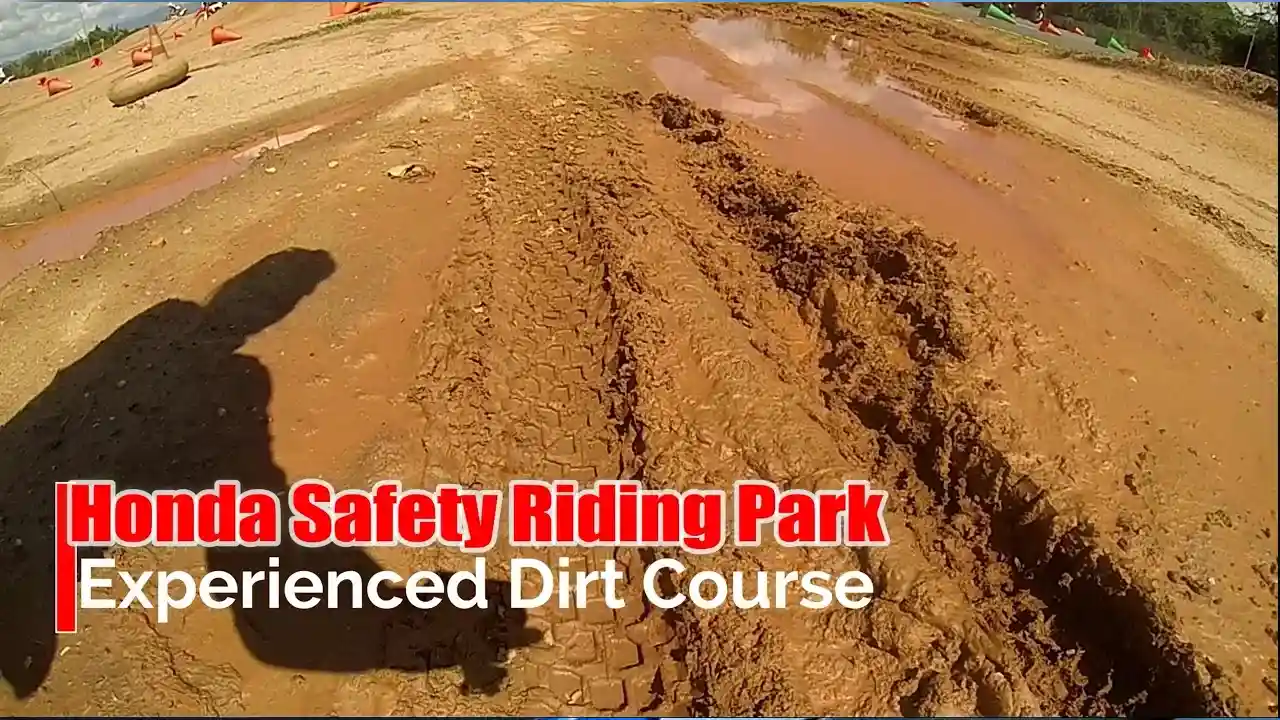
Featured: Honda Riding park
Locations: Bangkok – Chiang Mai – Phuket.
Honda Safety Riding Park has a fantastic facility offering on and off-road courses. Beginner classes – Experienced, plus License courses which assist you obtaining a license. Price is approximately 2000 Baht per full-day course. They have facilities in Bangkok, Chiang Mai, Samut Prakan & Phuket. A great resource for riding in Thailand.
Yamaha Riding Academy
Location: Outer Bangkok (Samut Prakan)

Suzuki Riding School
Location: Outer Bangkok (Phatham Thani)


Rentals & Gear Shops
Note: It is a good idea to take out insurance when renting a bike when riding in Thailand, if you haven’t already. Go to the insurance section for more info.
C&P Big Bikes
C&P Big Bikes has a growing fleet of motorcycles (250cc and upwards). Lan, the owner, takes exceptional care of the bikes, so you are guaranteed a quality rental bike for riding in Thailand. Lan is usually the first to get hold of any newly released motorcycle.
MR Mechanic

A long-established rental company, offering quality rental bikes. They also offer insurance on their bikes. The Big Bike selection is small but of good quality. They specialise more in scooters. (They also offer car hire). Great prices!
Mango Bikes

Mango Bikes is a foreigner-owned rental company, with well-cared-for rental bikes at great prices. They specialise in scooters with a few lower cc motorbike options.
A reliable rental place if you are looking for a scooter or lower cc motorbike when riding in Thailand.
POP (Big Bikes)

POP is the long established Big Bike rental company in Chiang Mai. Normally they have the largest fleet of motorcycles, but in recent times their stock has reduced (and the quality of rental bikes are hit and miss). The prices reflect this though and so they are a cheaper option.
Important tips when renting a bike for riding in Thailand.
- Check motorcycle for existing damage and take photos/videos (so that you are not charged for this damage when returning the bike)
- Check condition of tyres to ensure they have decent tread and not overly hard from sun damage.
- Check tyre pressures, brakes and gears.
- Point any issues out to the rental company.
If you damage a rental bike, get a quote from a local mechanic or dealer and then talk to the rental company to negotiate a repair price. Having gained knowledge on what the repairs will cost gives you an advantage when negotiating with the rental company.
Currently, these recommendations are for Chiang Mai only.
Enjoying the Content?
Border Crossings & IDPs
Currently, Myanmar and Cambodia is closed due to conflict and Vietnam is only possible if using a guide. Some crossings are friendlier than others.
Note: A 5-Year Thai license is required to apply for the International Driving Permit.
DOCUMENTS REQUIRED
The documents you will need for the license application:
- Medical Certificate
- Residency Certificate
- Copy of Passport and Visa page
- Your Current License
- Application for Driving License
STEP 1 – Medical Certificate
The medical certificate is a simple in-out check-up, involving a weight and heart rate check. Drop into any hospital/clinic and let the staff know that you need a medical certificate for a driving license application. They will know what you need. Very straight-forward. Walk in, pay, and go.
Cost: Approximately 100-200 baht (depending on where you go).
STEP 2 – Residency Certificate
The simplest place to obtain a Residency Certificate is from the local immigration office of the town or city you are staying in. Certificates may also be issued by your Embassy, but the cost is usually much higher. The fee and time to process the certificate vary depending on the rules your immigration office has set.
Cost: the price will vary from free to 1500 Baht (also depending on if you use an agent)
What you will need:
1: 2 x Colour Photos
(2×2 Inch)
With the updated current system this may not be required. It is still a good idea to have, just in case.
2: Copy of Passport Info
Photo/Info page, Visa page, TM6 arrival / departure card.
Take original passport also.
3: Proof of Address
Rental contract, blue/yellow book – or letter from your landlord.
4: Application Form
Available at immigration, or can print out one directly from below.
APPLICATION FORM
Immigration times for processing certificates:
DROP OFF:
between 9 am and 12 pm,
along with the fee.
PICK UP:
between 1 pm and 4:30 pm.
(Usually) next day. They will inform you.
STEP 3 – The DLT
Take your documents to the nearest DVLA Land & Transport Office and hand them in at the counter, requesting to apply for the IDP They will check your documents and issue you with a number. Wait in the waiting area until called.
STEP 4 – Final Step
When your number is called you will be requested to pay the fee for the IDP.
[wbcr_advert_snippet id=”18970″]
Thank you very much for this great resource!
I was at Helmet shop you mentioned. I am a bit worried not to have brought my own helmet from home. Are those 50$ DOT ECE helmets to be trusted?
Besides is there any store offering quality kevlar pants? I only saw Badass brand with 3% kevlar.
Hi Lucca! Which DOT ECE Helmets did you notice? I have one cheaper brand which is “Daddy Helmet” brand. (I made a video on it here: https://www.youtube.com/watch?v=Nnb19w4ok00), the stress-testing of this brand matches with my old Shoei helmet. Shark and Bilmola are budget brands which meet ECE DOT testing standards, also. The technology and quality is not as good as the higher-end brands but they can still be trusted. Have a chat with the owner there, he is very knowledgeable and open about the quality and standard of the items. He doesn’t try to squeeze money out of you, and can be trusted – which is why I like to recommend him. His reputation matters to him.
At one point I saw some discounted good brand helmets at the front and he openly told me they are discounted because the are old stock and degraded, which I appreciated knowing. Also, he ordered in boots for me because he did not have my size. He will order things for you to try, if you have a specific request, without the obligation to buy. I have been happy with everything I have bought from him.
As for the Kevlar pants, they are usually in the air conditioned area. The staff can help you out. It may be that they are short of stock items or that there isn’t enough current requests for certain items. Again, you could always talk with the owner to see what he can do for you. He might be able to source what you are needing from him and get it in for you, with no obligation to buy.
In fact, when I get a chance, I will aim to put together something more detailed on this. I do have a general helmet guide, but not one specific to certain shops. It’s a very valid and important question and thanks for mentioning it.
Hope that helps!